Transferring data to your WALKMAN
About this tutorial
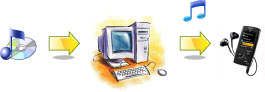
You can store computer data into the built-in flash memory of the player by transferring the data from your computer using Windows Explorer, or another transfer capable software. If the player is connected to the computer, the built-in flash memory appears in Windows Explorer as [WALKMAN.]
Data can directly be transferred by dragging and dropping using Windows Explorer or Windows Media Player 11. You can use Windows Media Player 11 to rip songs from your CDs to your computer so that they become files on your computer. After that, you can sync the ripped songs with your WALKMAN; burn a customized music CD for enjoying at a party or in your car; or play the songs anytime from your computer without the hassle of having to find the original CD. Not only songs can be transferred to your walkman but also videos and photos.
Getting Started
Check your computer software before connecting the player
Before connecting the Walkman to your computer, please make sure that:
- The Operating System (OS) is Windows XP (Service Pack 2 or later) or Windows Vista.
- The installed Windows Media Player on your computer is version 10 or 11. Please note that Windows Media Player 11 is needed for transferring video and Advanced Audio Coding (AAC) files.
(Please Click on the sign to expand the relevant section)
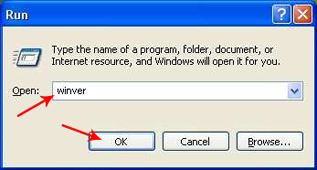
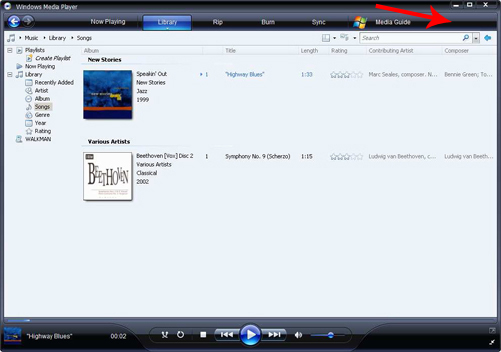
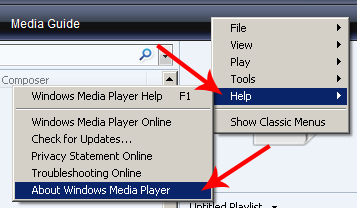
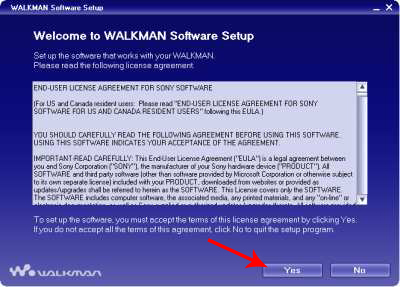
How to check which version of the Windows Operating System is installed on your computerHow to check which version of Windows Media Player is installed on your computerInstalling Windows Media Player 11


Transferring data to your walkman
Transferring Videos:
Transferring videos to your walkman using Windows explorer:
Drag and drop files or folders into the "VIDEO" folder. On the 1st level, the "VIDEO" folder will recognize either a file or a folder. Files on the 2nd level will be recognized. However, folders beyond the 2nd level and files beyond 3rd level will not be recognized.
Note: The "MP_ROOT" folder is used only when the player connects using certain dedicated software, or device. When you transfer data by dragging and dropping, use the "VIDEO" folder. |
On the player the folders are displayed in the folder name order first, then files are displayed in the file name order.
Tip: You can set JPEG files as thumbnails of video files, by placing JPEG files in the corresponding video folders. When you display the video list, you can see the thumbnails (small pictures to display on the menu) for the video files on the player. To display a thumbnail for a video file, create a JPEG file (horizontal 160 x vertical 120 dots, extension: .jpg) and name it the same as the desired video file, then store it in the video file folder. |
Transferring photos:
Transferring photos to your walkman using Windows Explorer:
Drag and drop files or folders into the "PICTURE" or "DCIM" folder. On the 1st level, the "PICTURE" folder will recognize either a file or a folder. The "DCIM" folder will only recognize a folder. Only files on the 2nd level will be recognized by both "DCIM" and "PICTURE" folders. However, beyond the 2nd level, neither files nor folders will be recognized. On the player the folders under the "PICTURE" and "DCIM" folders are displayed in alphabetical order. Files in the 1st level of the "PICTURE" folder are stored in the PICTURE folder.
Notes:
|
Transferring songs:
There are three main tasks you need to learn before you can play your music on your Walkman. First learn how to rip (copy) music from a CD on to your computer that you want to sync (copy) to your Walkman. Second, learn how to connect to your Walkman, and third, sync (copy) the songs on your computer that you want to listen to on the Walkman.
 |
|
|
Step 1: Ripping (copying) songs from a CD to your computer
Step 2: Connecting your WALKMAN to your computer
Step 3 : Synchronising (copying) music to your WALKMAN
|
 . (Partially ripped songs are not saved.) Select the songs you want to rip, and then, at the bottom of the List pane, click Start Rip
  to restart ripping.

 Walkman logo on the plug faces upwards.
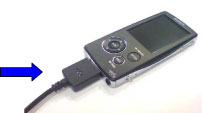


 as highlighted in the following screen shot.
Advanced Options
The following sections will tell you in detail how you can create and transfer Playlists containing your favourite tracks, and how you can search and organize your music library. It will also offer alternative options for ripping and syncing music files.
|
Changing the bit rate (quality) or format.
More ways to sync (copy) music to your WALKMAN
Create and Manage Playlists
Organize and search your digital media collection
|


 .
.


 at the bottom of the List pane, and then type a name for the playlist.
 .
.
 while the item is playing.